
网络操作系统VyOS应用实践(一) | SDNLAB | 专注网络创新技术


本文在前面安装篇的基础上,对其功能进行应用实践。本文先介绍使用中的一些注意事项,后面介绍其网络接口相关的功能。

This paper applies its functionality on the basis of the previous installation. This paper describes some of the concerns in use, followed by functions related to its network interface.
这款操作系统目的是为了在x86平台上,实现交换机、路由、防火墙等功能。在Vyatta被博科收购后,社区推出了这个开源的fork。令笔者很好奇的是,似乎Vyatta/VyOS在日本挺受青睐,在日本亚马逊可以看到11年和14年出版的两本介绍Vyatta的书,因为VyOS是一个fork,大概在操作上基本一致。
The purpose of this operating system is to achieve switchboards, routers, firewalls, etc. on the x86 platform. After Vyatta was acquired by Boko, the community introduced this open source fork. It was curious to me that Vyatta/Vyos seemed to be popular in Japan, where two books about Vyatta were published in 11 and 14 years, because VyOS was afork, which was probably operationally consistent.
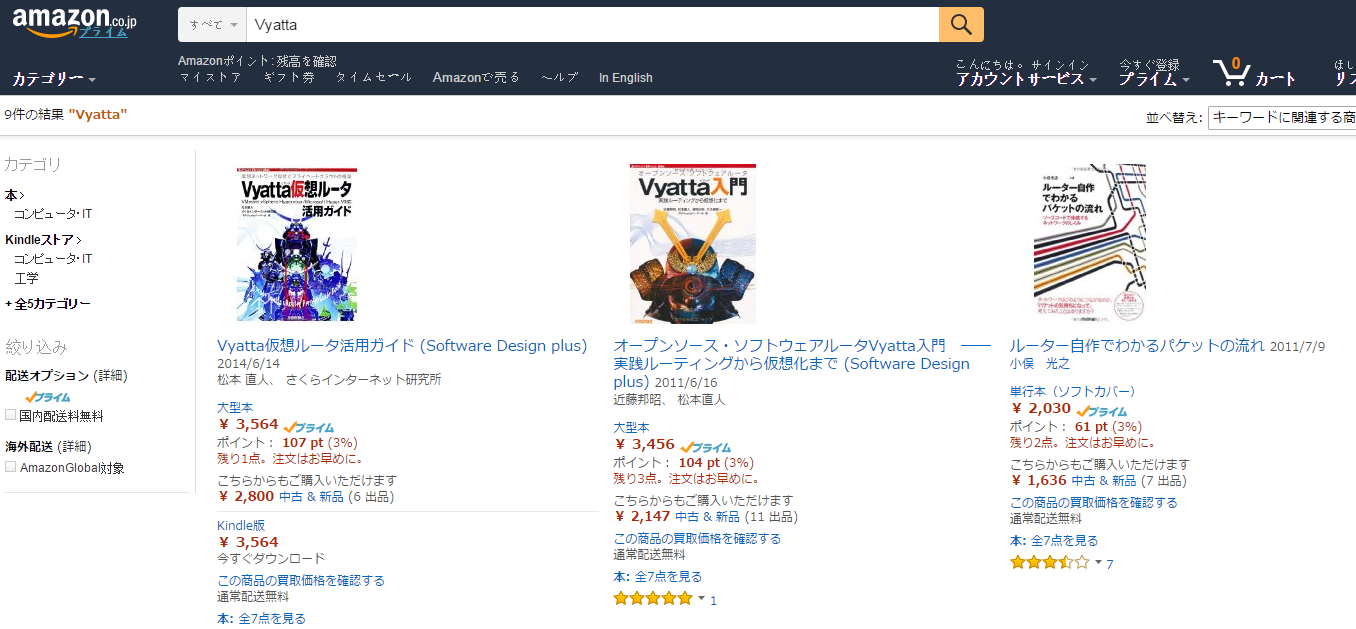
3000日元折合人民币大概是168-170人民币左右(日本书贵)
3000 yen equivalent to about 168-170 yuan.
为了支持通过串口或usb访问VyOS,VyOS还提供了三种console:
In order to support visits to VyOS through serialism or onusb, Vyos also provided three cosoles:
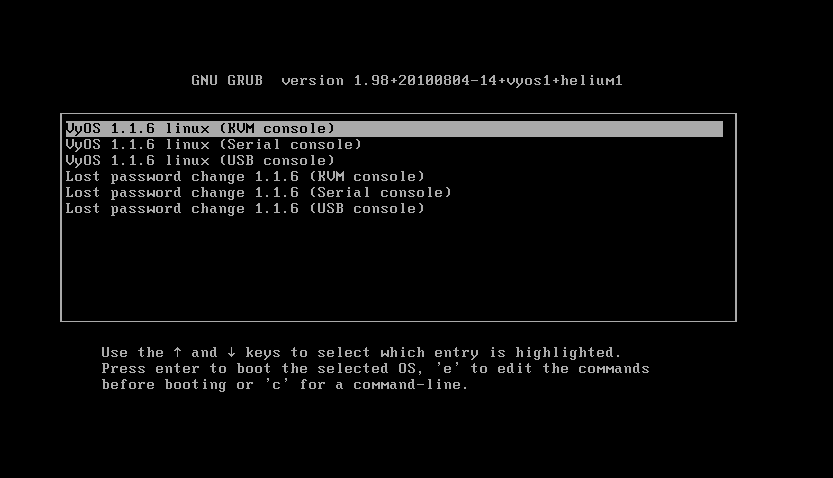
由于笔者环境限制,只能在虚拟机上测试,选择默认的KVM console即可。
Due to the constraints of the pen environment, the test can only be performed on a virtual machine and the default KVM console can be selected.
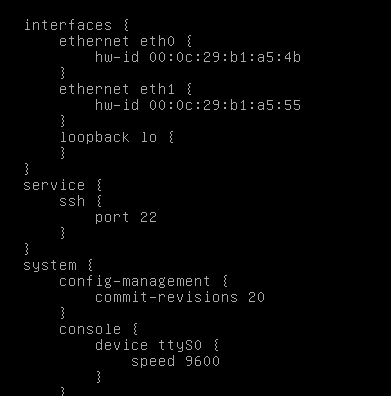
登陆到VyOS后,可以输入show configuration查看目前系统的配置信息:
When you land on VyOS, you can enter how configurations of the current system can be viewed:
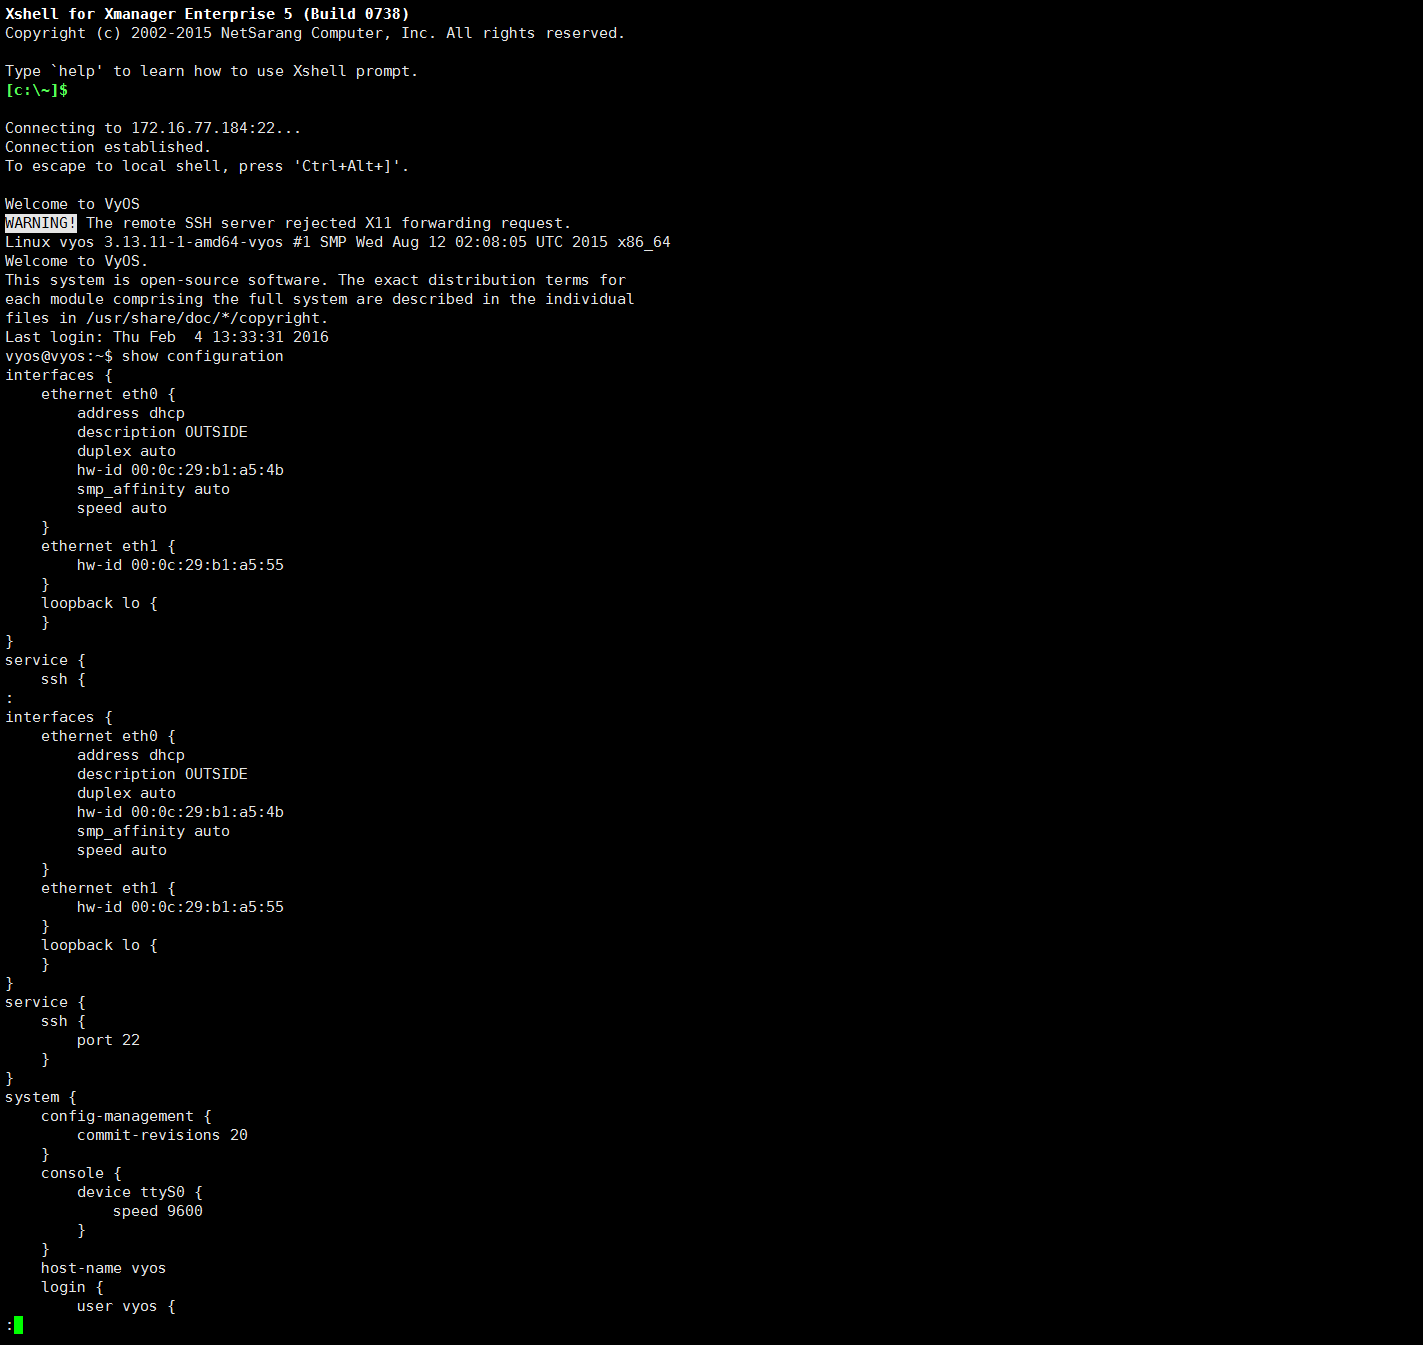
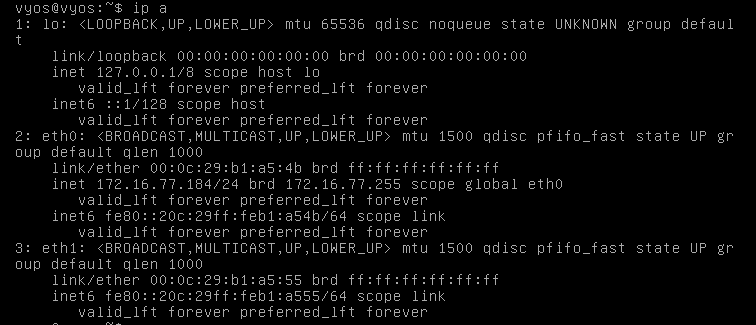
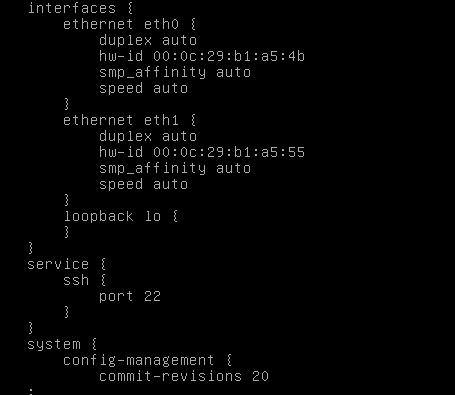
在interfaces中,可以看到目前系统中有三个网络接口,lo、eth0和eth1,eth1并没有配置ip地址。
In interfaces, it can be seen that there are three network interfaces in the current system, and lo, eth0 and eth1, eth1 do not have an ip address.
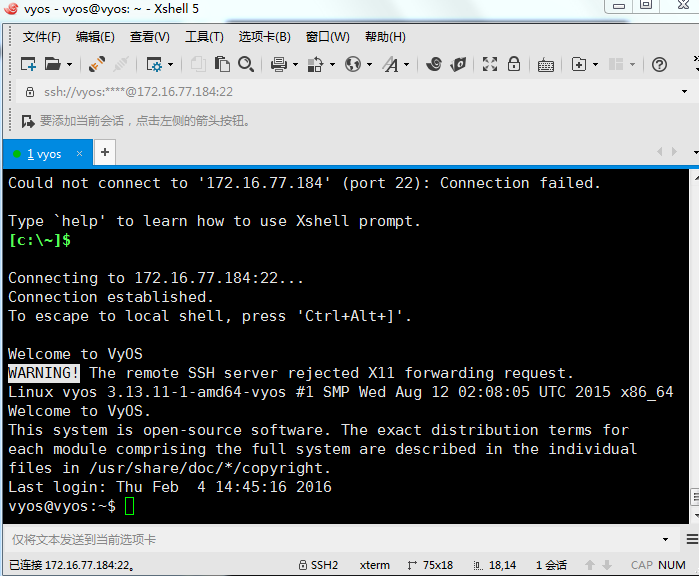
在service中,我启用了ssh,通过xshell连接到VyOS。
In service, I activated ssh, connected to VyOS via xshell.
在最底下还可以看到console的信息,主机名和登陆的用户名。
Information on console, host name and user name for landing can also be found at the bottom.
最底下的“:”,输入q即可停止查看信息。
At the bottom of ": ", enter q to stop viewing the information.
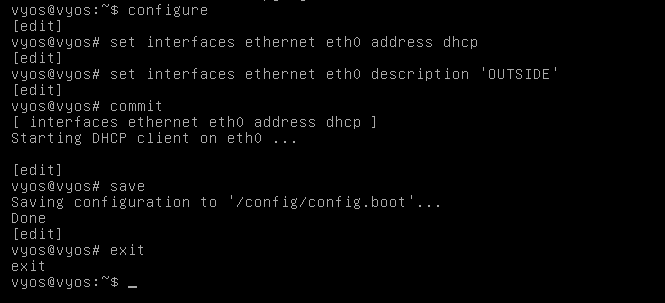
在VyOS中,任何配置都应该通过configure模式进行设置,输入configure以进入该模式:
In VyOS, any configuration should be set up through the confuture mode, which is entered into the mode:
|
1 2 3 4 |
vyos@vyos:~$ configure [edit] vyos@vyos# |
进入configure模式之后,每输入一个命令就会echo一个“[edit]”,指明现正处于编辑模式。在完成你想要的设置后,要commit,再save才能保存配置信息:
After entering the Confuture mode, each command is "[edit] ", specifying that it is currently in editing mode. Once you have completed the setup, you need to come to the point where you can save the configuration information:
|
1 2 3 4 5 6 7 8 |
vyos@vyos# commit No configuration changes to commit [edit] vyos@vyos# save Saving configuration to '/config/config.boot'... Done [edit] |
每次都会保存信息到/config/config.boot,最后我们还要输入exit退出configure模式,变为普通模式:
Information is stored at/config/config.boot, and finally we have to enter exit exit confuture mode into normal mode:
|
1 2 3 |
vyos@vyos# exit exit |
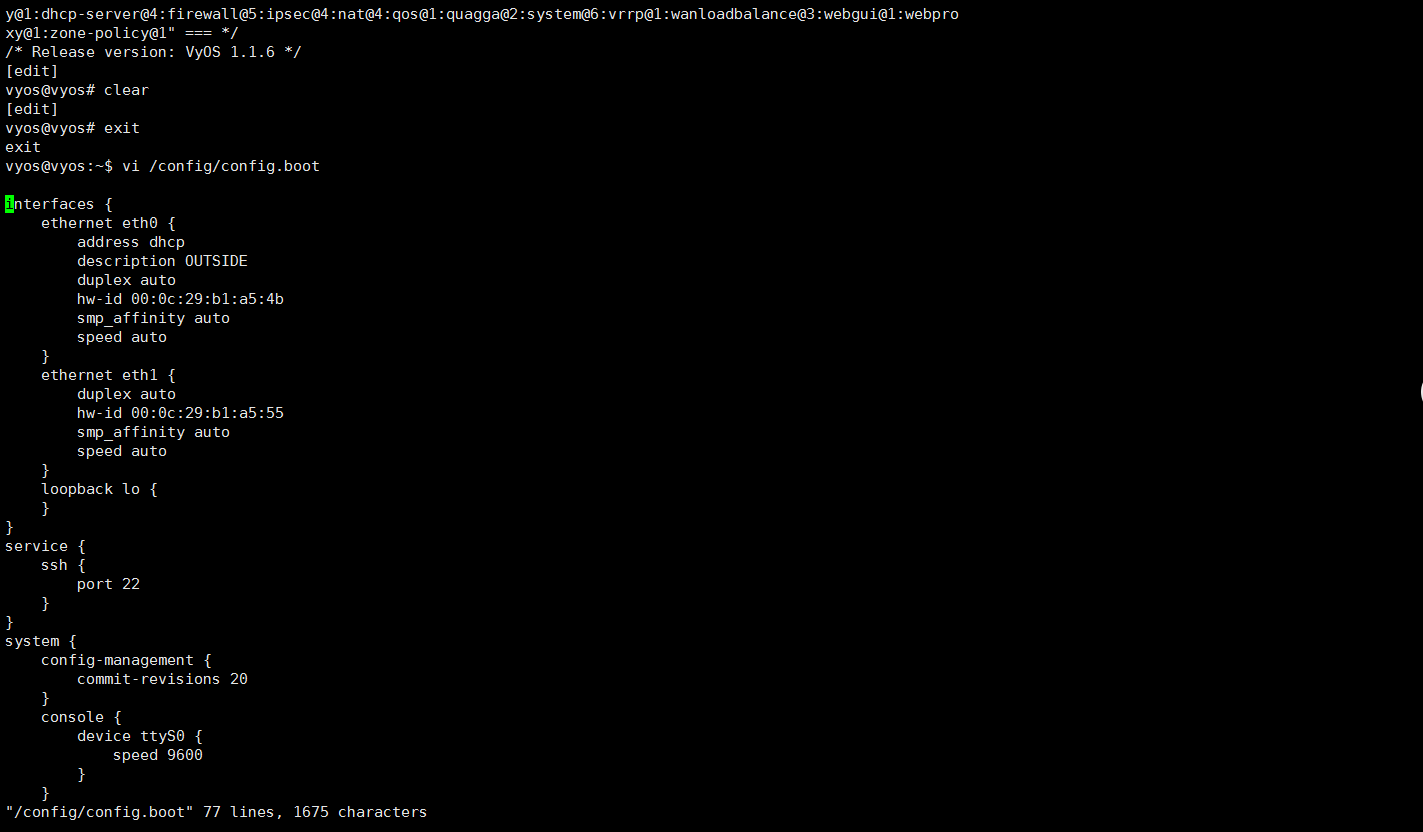
可以查看config.boot文件:
You can view the config.boot file:
可以输入show configuration commands来查看命令范例:
You can enter how command examples can be viewed:
|
1 2 3 4 5 6 7 8 9 10 11 12 13 14 15 16 17 18 19 20 21 22 23 24 25 26 27 28 29 |
vyos@vyos:~$ show configuration commands set interfaces ethernet eth0 address 'dhcp' set interfaces ethernet eth0 description 'OUTSIDE' set interfaces ethernet eth0 duplex 'auto' set interfaces ethernet eth0 hw-id '00:0c:29:b1:a5:4b' set interfaces ethernet eth0 smp_affinity 'auto' set interfaces ethernet eth0 speed 'auto' set interfaces ethernet eth1 hw-id '00:0c:29:b1:a5:55' set interfaces loopback 'lo' set service ssh port '22' set system config-management commit-revisions '20' set system console device ttyS0 speed '9600' set system host-name 'vyos' set system login user vyos authentication encrypted-password '$1$G3Gocetw$oOs8fJJcyV1bUXg6Hee4g/' set system login user vyos authentication plaintext-password '' set system login user vyos level 'admin' set system ntp server '0.pool.ntp.org' set system ntp server '1.pool.ntp.org' set system ntp server '2.pool.ntp.org' set system package auto-sync '1' set system package repository community components 'main' set system package repository community distribution 'helium' set system package repository community password '' set system package repository community url 'http://packages.vyos.net/vyos' set system package repository community username '' set system syslog global facility all level 'notice' set system syslog global facility protocols level 'debug' set system time-zone 'UTC' |
接下来我们通过一个简单的例子来实践一下:
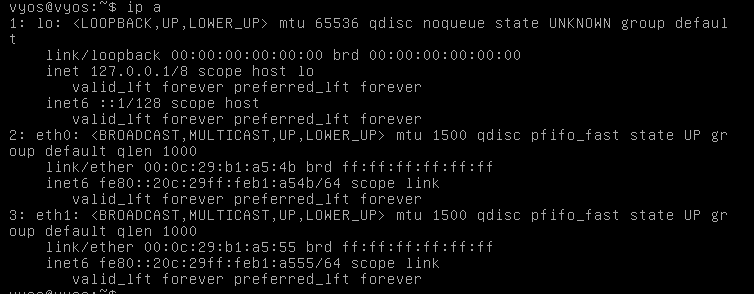
笔者所用的这个VM有两个interface:
Here's a simple example:
The VM used by me has two interfaces:

网络适配器1是通过vmware的dhcp服务获得IP地址的,而网络适配器2用的是host-only模式,VMnet5的设定可以看下图:
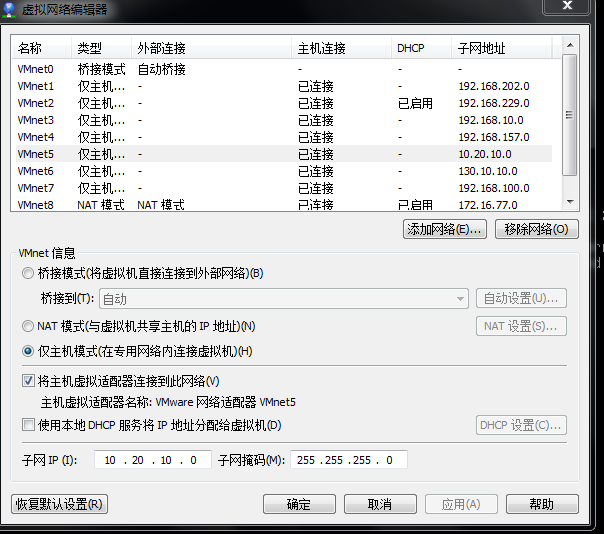
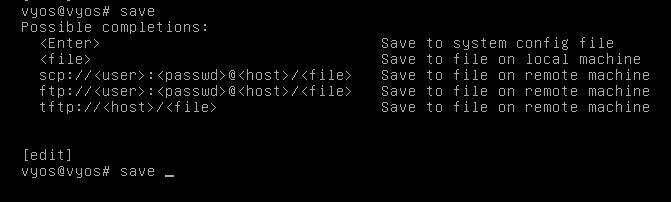
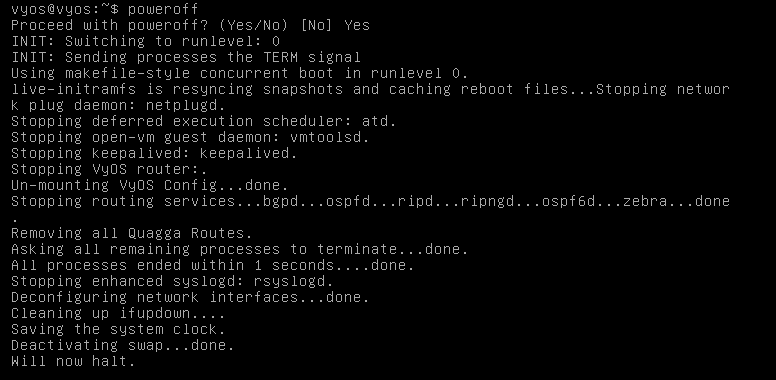
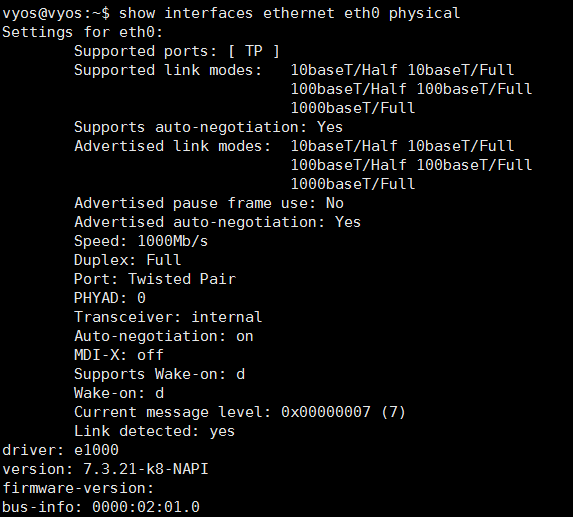
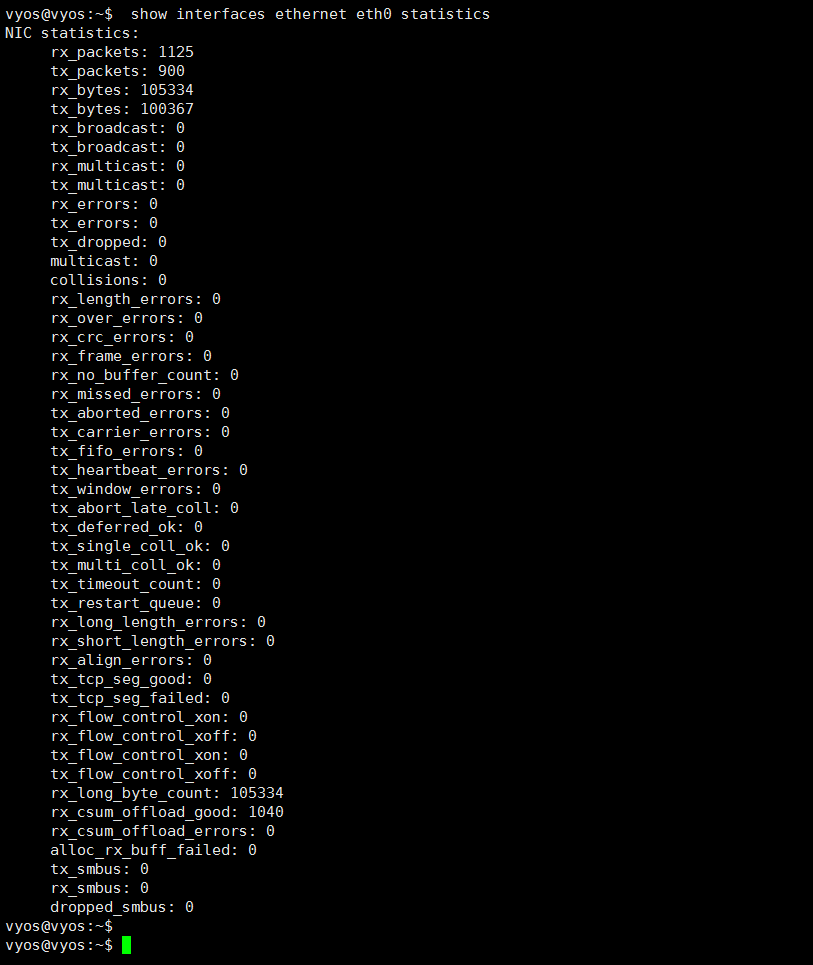
Network adapter 1 has an IP address via a dhcp service in vmware, while network adapter 2 uses host-only mode and VMnet5 settings can be seen below: 此时VyOS并没有任何IP,无法通过xshell进行操作,我直接在vmware的窗口中操作: At this point, VyOS does not have any IP to operate through xshell, and I operate directly in the vmware window: 进入configure模式,配置eth0的方法如下: Enter the confuture mode and configure the eth0 as follows: 查看设置是否成功: Could not close temporary folder: %s 可以看到eth0已经通过dhcp获得IP地址了。 You can see that eth0 already got an IP address through dhcp. 尝试用xshell连接,成功了: Tried to connect with xshell. Success: 如果你想删掉某个配置项,把set改为delete就行,最后commit和save。 If you want to delete some of the configurations, change the set to delete, finally comemit and save. 在configure模式中,由于不允许未保存而exit,一般都要commit、save才能exit: In the Confuture mode, where exit is not allowed to remain unsaved, it is usually required to come to the point, save to the point: 如果你想强行退出,输入exit discard即可: If you want to force your exit, enter exitdiscard: 可以看到没有save的话,任何设置都不会变更。 As you can see, no setting will change without save. VyOS维护了一份配置变更表,可以通过在configure模式中输入compare [TAB]查看: VyOS maintains a configuration change sheet that can be viewed by entering compare [TAB] in the confuture mode: 可以通过指定Revision的编号查看变化信息: Could not close temporary folder: %s 以“+”开头的是增加的内容,“-”是删除的内容。 The word “+” begins with the addition and the word “-” with the deletion. 我们还可以回滚配置,回滚后会重启: We can still roll back the configuration, and when we roll back, we'll reboot: 由于回滚到了之前没有设置ip地址的配置,所以xshell连不了 Since there was no configuration for the ip address prior to the rollback, xshell couldn't connect. 在configure模式中,输入save [TAB]可以看到以下内容: In confuture mode, enter save [TAB] to see the following: 可以通过scp等方式保存数据到远程机器,这大大方便了工程师在自己的电脑上用虚拟机测试好设置后,直接把配置文件发送到远程的当做防火墙或路由的VyOS设备上。 Data can be saved to remote machines such as scp, which greatly facilitates the ability of engineers to send configuration files directly to remote VyOS devices as firewalls or routers after testing their settings with virtual machines on their computers. 至于关机,要输入poweroff而不是shutdown: As for shutdown, enter Poweroff instead of shutdown: 在VyOS中可以通过show interfaces查看系统所有的接口: In VyOS, all the interfaces of the system can be viewed through show interfaces: 可以看到目前系统中的三个接口,其中eth1没有设置ip地址。 Three interfaces can be seen in the current system, of which Eth1 does not have an ip address. 如果想查看单独一个接口的详细信息,可以在show interface后制定类型和接口名: If you want to see more detailed information about a single interface, you can develop a type and interface name after Show interface: 每个接口都可以配置一个描述信息和地址: Each interface can be configured with a description and address: 以太网配置的内容有: Ethernet configurations include: 下面根据上面show interfaces的环境,配置一个静态地址: The following is a static address based on the environment above show interfaces: 查看是否配置成功: Could not close temporary folder: %s 可以看到我们已经成功设置eth1了,如果配置的内容已经存在,则提示配置已存在。 You can see that we have successfully set eth1 and if the configuration already exists, the hint configuration already exists. 检查网络配置文件,其实接口信息并没有设置在这里,而是在VyOS启动时自动从config.boot加载设置: Check network configuration files, the interface information is not set here, but automatically load settings from config.boot at VyOS startup: VyOS还提供了额外的命令用来查看接口的物理信息(这是vmware虚拟网卡的信息): VyOS also provided additional physical information to be used to view the interface (this is information from the Vmware virtual web card): 如果想看接口的统计信息,可以输入show interfaces ethernet <接口> statistics If you want to see statistical information about the interface, enter how interfaces othernet & lt; interfaces >statistics 在VyOS中提供了对802.1q VLAN的支持,通过输入set interfaces ethernet vif 实现。 Support for 802.1q VLAN was provided in VyOS through the input set interfaces ethernet vif. 可以看到将会增加下面的设置: You can see that the following settings will be added: 保存退出configure模式后,查看接口信息: After saving exit configure mode, view interface information: 在VyOS中,VLAN接口会以name.vlan_id的格式显示。 In VyOS, the VLAN interface is shown in the name.vlan_id format. VyOS提供了Bridge,可以让两个接口桥接实现二层交换,下面会创建一个bridge,同时设置VLAN(备注,如果按照前面的设置了VLAN接口,需要删除才能做下面的实验)。 VyOS provides Bridge, which allows two interface bridges to be exchanged on the second floor, creating a Bridge below and setting up VLAN (remarks that if VLAN interfaces are set in front, deletion is required before the next experiment can be performed). bridge可以设IP地址 Bridge can set an IP address 启用STP: Enable STP: 保存退出后,可以看到这个bridge的信息: After saving the exit, you can see this message for Bridge: 输入show bridge spanning-tree查看STP的设置: Enter how young spanning-tree views the STP settings: 想查看网桥上MAC地址的记录,可以输入show bridge macs: If you want to see the records of the MAC address on the bridge, you can enter how Bridge Macs: 通过bonding,可以让多个物理接口变为一个逻辑接口,以提高网络性能。 Through Bonding, multiple physical interfaces can be transformed into a logical interface to enhance network performance. 先设定一个新的bond接口: Set a new Bond interface first: 设定hash_policy,VyOS有三种policy: Set the ash_policy, VyOS has three types of policy: 这里直接用layer2: Let's go straight to the player 2: 设定bond mode,有多种mode: Set bond mode, with a variety of modes: 最后把接口加到我们的bond0中: Finally, add the interface to our Bond0: 保存退出configure模式之后就可以通过下面的命令查看详细信息: Saves exit configure mode to view details through the following command: 你无法修改这个bond0的duplex等参数,但是可以进行设定IP地址等操作。 You cannot modify parameters such as this Bond0 duplex, but you can set an IP address, etc. 本文通过实践,先详细地介绍了VyOS的使用方面的细节。实际上,VyOS和Cisco IOS等系统其实也差不多,熟悉传统设备的人员应该也能快速上手。后面的内容对 VyOS中几个常用的interfaces进行了介绍,希望能对那些对VyOS有兴趣的研究者有所帮助。在后面的文章中,会通过实验对VyOS的功能进行应用,进一步体验VyOS的魅力。 In practice, the details of the use of VyOS are described in detail. In fact, VyOS and Cisco IOS systems are similar, and people familiar with traditional equipment should be able to do so quickly. 参考资料: 作者简介:何智刚,2015至今,现为广东的一名在校高三学生,在学习之余,主要研究Docker,OpenStack,SDN,对各种领域都有所涉猎,目标是迈向full stack author's brief : Ho Ji-gang, from 2015 to date, is now a senior student in Guangdong and, in addition to his studies, focuses on Docker, OpenStack, SDN, all areas of hunting, with the goal of moving towards full stack.
注册有任何问题请添加
微信:MVIP619
拉你进入群
打开微信扫一扫 添加客服 进入交流群

1.speed
2.duplex
3.MAC地址
4.IP地址
5.描述信息
1.sped
2.duplex
3.MAC address
4.IP address
5.
1.layer2:用MAC地址生成hash
2.layer2+3:用MAC和IP地址生成hash
3.layer3+4:用IP地址和端口生成hash
1.layer2: ash
2.layer2+3 from MAC address: ash
3.layer3+4 from MAC and IP address: ash from IP address and port
http://vyos.net/wiki/User_Guide
1.本站遵循行业规范,任何转载的稿件都会明确标注作者和来源;2.本站的原创文章,请转载时务必注明文章作者和来源,不尊重原创的行为我们将追究责任;3.作者投稿可能会经我们编辑修改或补充。


